ECR 2019 / C-1685
Therapeutic ultrasound-guided shoulder injections: Tips and tricks to maximize efficacy and minimize patient discomfort
Congress:
ECR 2019
Poster Number:
C-1685
Type:
Educational Exhibit
Keywords:
Inflammation, Education and training, Education, Ultrasound-Colour Doppler, Ultrasound, Musculoskeletal system, Musculoskeletal soft tissue, Musculoskeletal joint
Authors:
U. Hasan1, T. Li1, D. Sadowsky1, T. Rashid1, J. Goldschmiedt1, H. Patel2; 1Valhalla, NY/US, 2Valhalla/US
DOI:
10.26044/ecr2019/C-1685

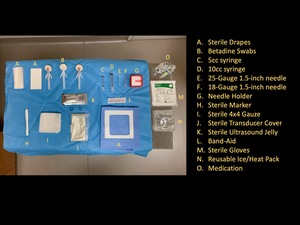
Fig. 6:
Standard departmental equipment used in most US-guided MSK injections

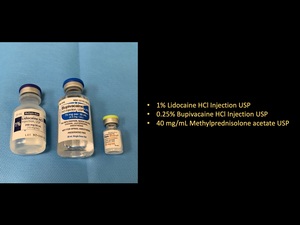
Fig. 7:
Standard medications used in most US-guided MSK injections

Fig. 8:
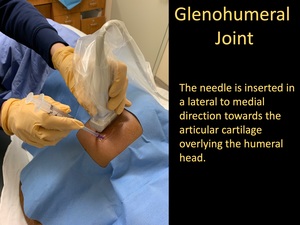
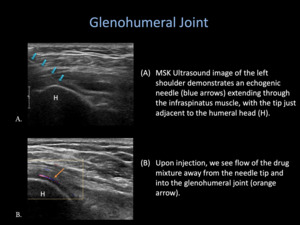
Glenohumeral Joint Injection

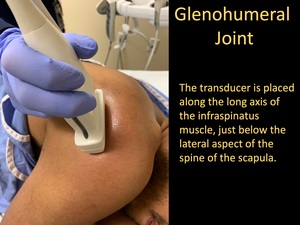
Fig. 9:
Glenohumeral Joint Injection

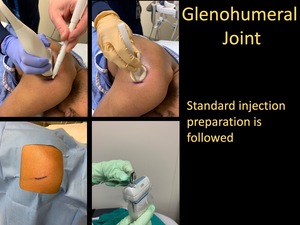
Fig. 10:
Glenohumeral Joint Injection

Fig. 12:
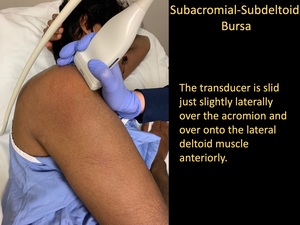
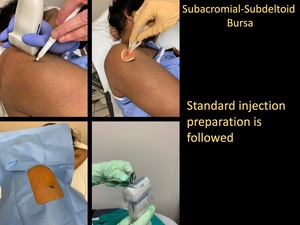
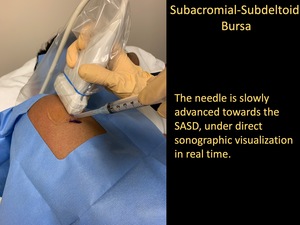
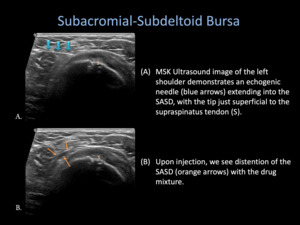
Subacromial-subdeltoid Bursa Injection

Fig. 13:
Subacromial-subdeltoid Bursa Injection

Fig. 14:
Subacromial-subdeltoid Bursa Injection

Fig. 16:
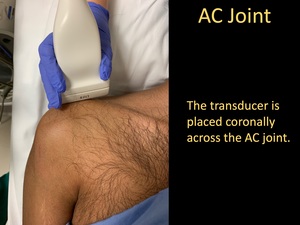
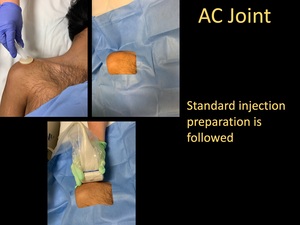
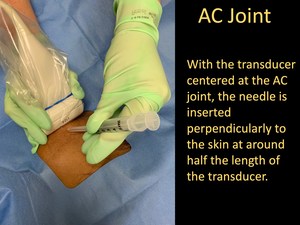
AC Joint Injection

Fig. 17:
AC Joint Injection

Fig. 18:
AC Joint Injection

Fig. 20:
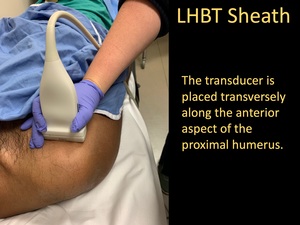
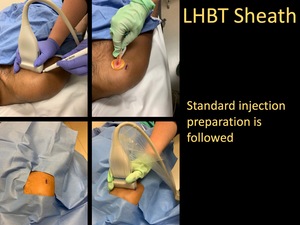
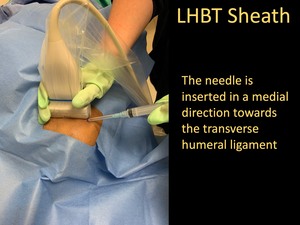
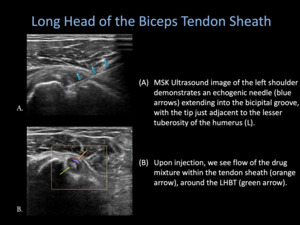
LHBT Sheath Injection

Fig. 21:
LHBT Sheath Injection

Fig. 22:
LHBT Sheath Injection

Fig. 24:
Ultrasound Jelly Warmer

Fig. 25:
Reusable Ice Pack

Fig. 19:
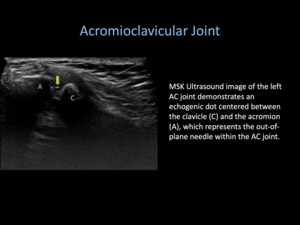
Acromioclavicular Joint Injection

Fig. 11:
Glenohumeral Joint Injection

Fig. 23:
LHBT Sheath Injection

Fig. 15:
Subacromial-Subdeltoid Bursa Injection